Hey there, retro gamer! Are you like me, and prefer to replace SteamOS with Batocera transforming your Deck into a Retro Gaming powerhouse ? Then this guide is for you…
Batocera
Batocera is an open-source and completely free retro-gaming distribution that can be copied to a USB stick or an SD card with the aim of turning any computer/nano computer into a gaming console during a game or permanently. Batocera.linux does not require any modification on your computer. Note that you must own the games you play in order to comply with the law.
A few notes before we begin
In case you disagree with the idea behind this guide, and prefer to Dual-Boot SteamOS with Batocera for whatever reason, fear not I have written a guide covering just that. Find it below.
Batocera On Deck - Part 1
Also this guide requires a bit of Linux knowledge. Since that method is considered less than ideal by many. The Deck was not made to be used that way so to speak. It’s more of a hack than an official thing.
The reason why
I for one never cared about playing Triple-A games on that thing. Maybe indie games yes, reason being, I never saw any advantage of going from high FPS to extremely low just to justify my purchase. In my eyes the Deck has always been a monster Emulation Machine, no more no less. That’s where am gonna leave it. Say what you will, it’s my Deck, so I can do with it as I please. Freedom…
Now on with the guide eh ?
What You Need:
Below is a list of things you will need before we proceed. I would recommend 2 cards, one you will be using and another as a backup, just in case something goes wrong.
- Linux Mint Debian Edition ISO.
- MicroSD Card: A fast U3 A2 card for ROM storage.
- Batocera Image: The image we will be using.
- Balena Etcher: Tool for flashing the image onto the microSD card
- Steam Deck: Your ultimate gaming device.
- Deck Dock for easy navigation via Keyboard & mouse.
Step-by-Step Guide
1. Download LMDE:
First things first, head over to the Linix Mint and grab the latest Linux Mint Debian Edition ISO. This is the Distro we will be using temporarily in order to Flash Batocera on Deck’s internal storage. It’s the only one I had on hand that actually worked, surprising isn’t it ?
Booting LMDE
Put it on your Ventoy USB, or flash it on USB stick with Balena Etcher choice is yours. Once done, power down the Deck, plug the stick in and boot it while holding the Volume up + Power, release power keep holding volume up until you are on the bios screen. Then select Boot Manager then choose to boot from the stick you created. This will boot into LMDE and get you on the desktop.
Connecting to WiFi
I would recommend you be connected over ethernet via Dongle/Hub if you can, but if you can’t, it’s Ok, I will show you how to connect to WiFi.
Using your mouse n keyboard, click on the WiFi icon in the system tray, select your connection and enter you password. That’s it. If you do not have a dongle or hub then it will be more difficult since LMDE was not created with the Deck in mind.
You would have to go into Settings > Accessibility > Keyboard and enable it from there. It’s up to you really. That’s why I would highly recommend you have a Hub/Dongle/Dock handy.
2. Download Batocera:
Now, head over to the Batocera Site and grab the latest image for the Steam Deck. Make sure you select the correct image for your Steam Deck’s architecture – this is crucial to avoid any hiccups later on.
3. Install Balena Etcher:
Next up, we need Balena Etcher. This handy tool will flash the Batocera image onto your microSD card. Download it from Balena’s Site, install it on your Steam Deck, and fire it up. It’s super user-friendly, so no need to sweat this part.
4. Flash Batocera to Internal Storage:

Open Balena Etcher, select the Batocera image file you just downloaded, and select the Deck’s SSD as the target. Hit the “Flash!” button and watch the magic happen. This process This should be done quick since image is only 3GB in size and you are flashing to a speedy SSD.
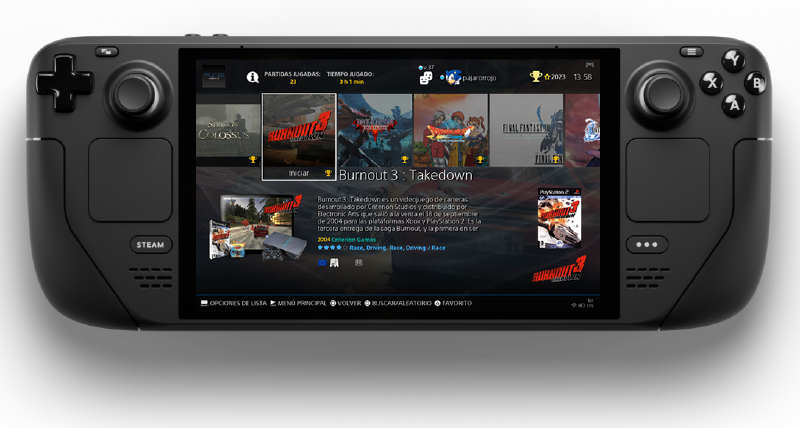
5. Booting into Batocera:
Once the flashing is done, power down the Deck and remove the USB. Now, power on the Deck and voila! You’re booting into Batocera. Welcome to the retro world!
6. First Time Setup:
When you boot into Batocera for the first time, there are a few housekeeping items to handle:
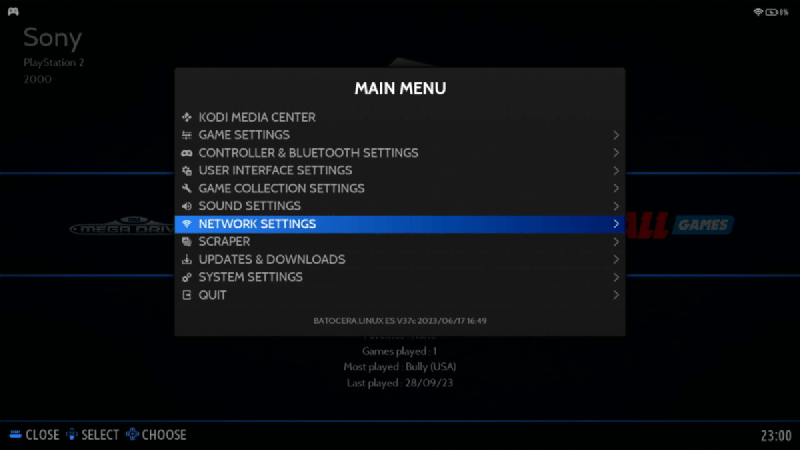
- Connect to WiFi: Press the Start button, navigate to Network Settings, and enable WiFi. Select your network and enter the password. You’re online and ready to go!
- Configure Controllers: Most controllers are supported right out of the box. Connect via USB or Bluetooth, then head to Controller Settings to map buttons if needed. Easy peasy.
- System Language: If you prefer a language other than English, go to System Settings and change the language. Now you can navigate in your language of choice.
7. Adding Your Games:
This is where the fun begins. You need to add your game ROMs/Bios Files:
For security reasons, and to avoid this post from being flagged, I will not be showing where to get any of them from. That’s up to you.
- Connect your Steam Deck to a PC or use the built-in file manager.
- Transfer your game ROMs to the “share/roms” directory on the Deck.
- Transfer your Bios files too for any 3D/Disc based consoles.
Although you can put your ROMs on the Deck’s internal SSD, do that only if you have either have enough storage (1tb or more) or as I said earlier, in case you don’t, then in Batocera’s menu, set the game storage to external and select microSD card (1tb recommended). Especially if you are like me and currently own complete ROM Sets, which can get HUGE ! I mean my PS1 RomSet alone is 600GB.. LoL.
If you want to do it over WiFi, just use your Distro’s file manager, in the address bar head on over to the device’s IP adderess that you can get from Network Settings.
Like so, smb://ipaddress. Keep in mind you will need a functional installation of SAMBA for your distro. If you don’t know how, I guess it’s time to use the power of Google lol.
In short, would be easier to have ROMs on a microSD card than internal storage, simply because you can just plug it into your PC/Laptop n do the transfer that way. Over WiFI would be slow and unreliable. Same with ethernet.
8. Customizing Batocera:
Now, let’s make Batocera your own:
- Themes: Go to the UI Settings to change themes and give Batocera a fresh look. There are plenty to choose from, so find one that screams “you.” Shaders: Enhance your gaming experience with graphical shaders. Find them in the Video Settings. They can make your games look even better than you remember.
- Emulator Settings: Tweak individual emulator settings for optimal performance. This can make a huge difference in how smoothly your games run.
Wrapping It Up
Before Batocera, my Steam Deck felt like a reliable but joyless workhorse. Installing Batocera changed everything. It transformed my Deck into a retro gaming paradise, making it feel more like the fun, nostalgic handhelds I love. With the retro magic of Batocera, my appreciation for the Deck skyrocketed.
In short, Batocera brings the joy of retro gaming front and center, making everything feel delightfully vintage and new all at once.
Enjoy your retro gaming adventure on the Steam Deck! With this guide, you’re all set to dive into the golden age of gaming. Happy gaming!